|
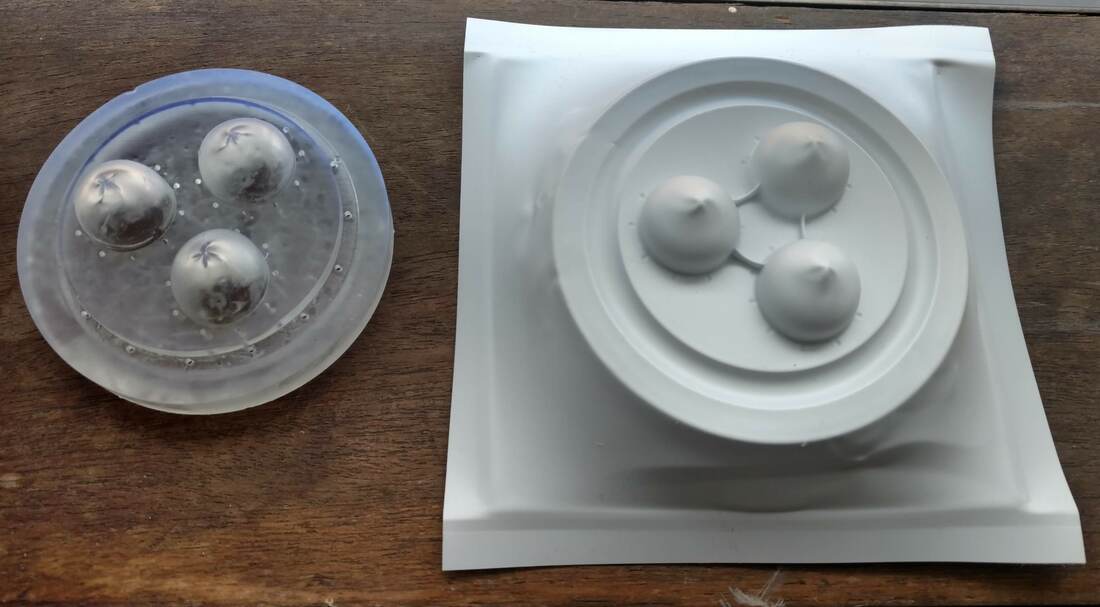
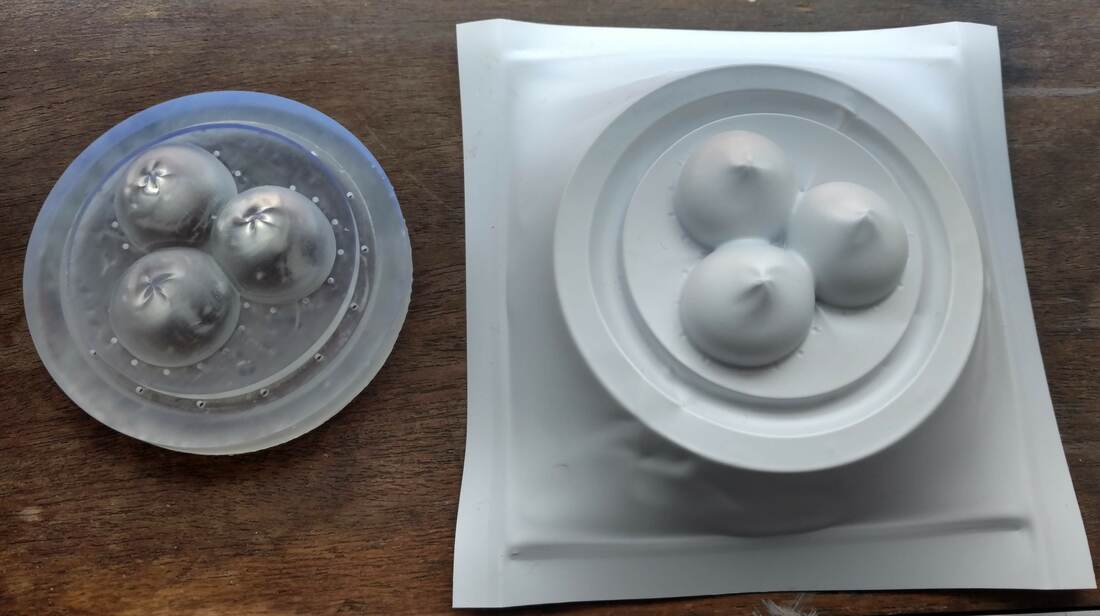
The baozis have been mass produced, assembled, and ready to be eaten! 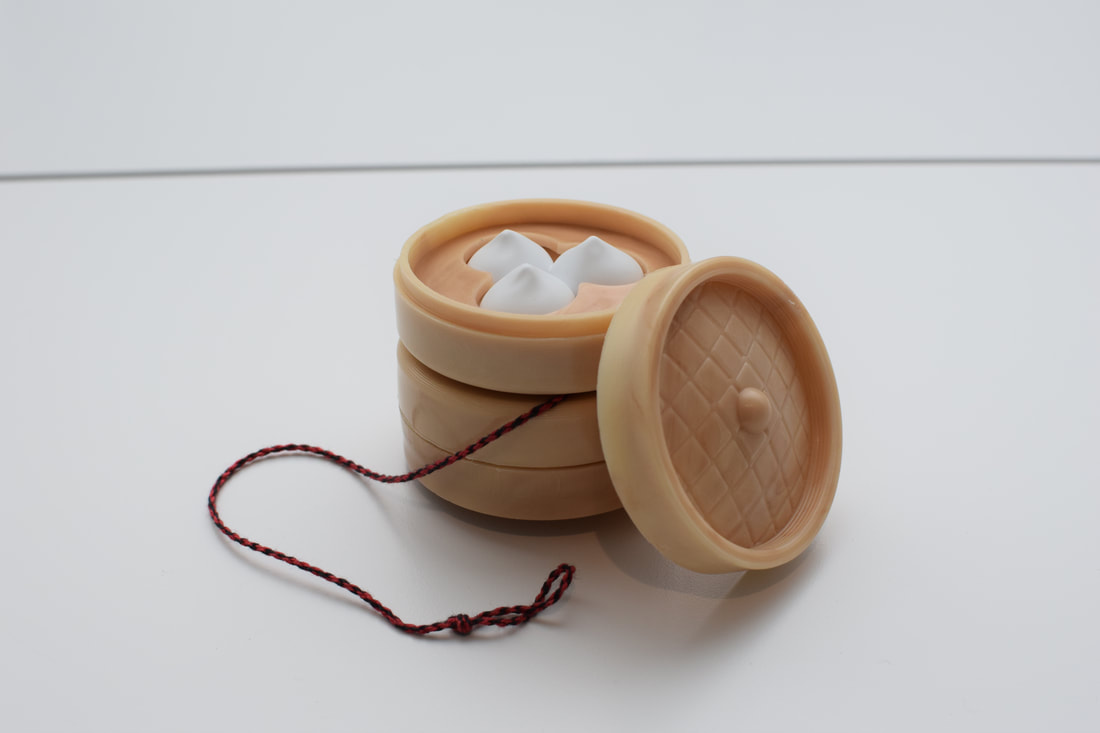 The baozi in deconstructed form, for you to replicate, is here! 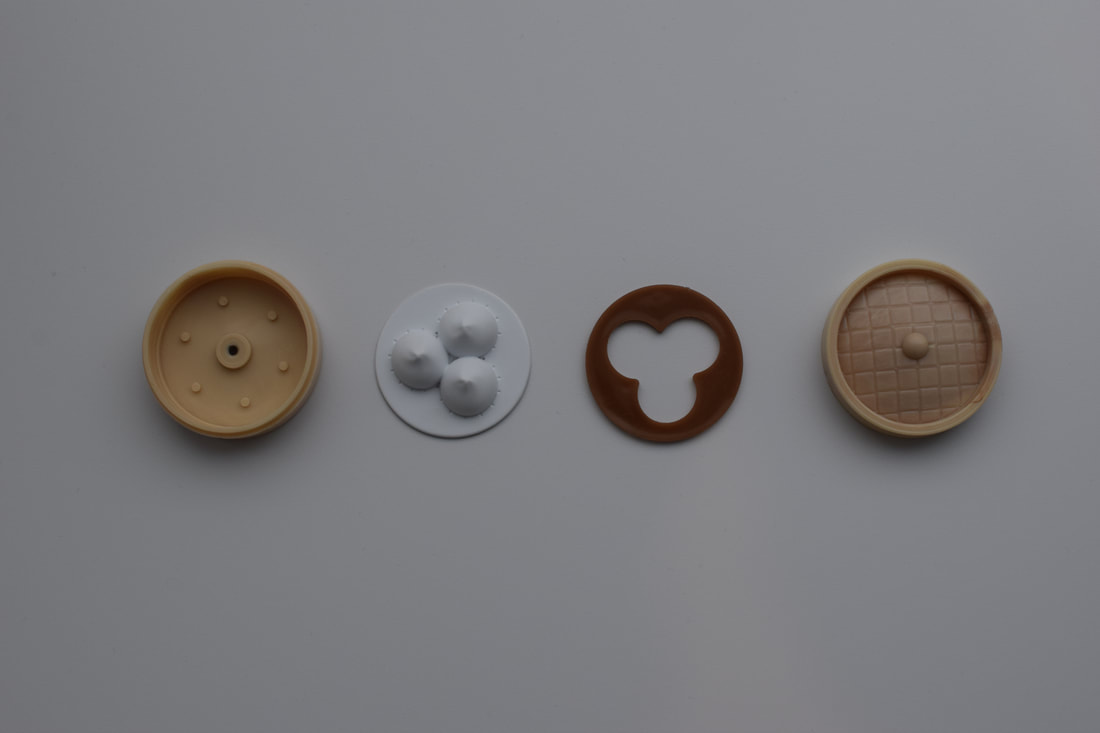 Overall, we ended up manufacturing and assembling the 50 baozi yo-yos. It did take quite a long time (approximately 11 hours in lab) to manufacture all the parts. The floor was remade a few times to ensure the snap fit onto the body was correct as the change in thickness of the floor changed the shrinkage. The lid and body fit together quite well, even though some fits were tighter than others. Our biggest argument yet came to be deciding the colors for the baozi. In the end, we decided on making the baozi as realistic as possible, so we chose a honey beige color for the body and lid, adding TWO brown color pebbles at an attempt to make a wood finish texture. The floor was made a darker brown color to help contrast with the baozi. Initially, we had planned to use black, but the darker brown made earlier in the process fit better than the black that was made. There was some post-processing necessary (getting rid of flash), but otherwise, assembly was quite easy. In celebration, we all ordered some dumplings to eat as a team! :)
0 Comments
This week we injection molded our yoyo body and floor for the first time. Doing so revealed a few challenges that we worked on fixing. Bao Body The very first mold of the body resulted in parts that were much too small to snap fit with the lid. Because our parts were very thick, the body shrunk more than expected. We then machined a second set of body molds to account for this issue, decreasing the thickness and increasing radial dimensions. By making these changes, the part shrunk less than before, which resulted in a body which was a bit too large to snap fit with the lid. We then created a third set of molds, which finally properly snap fit with the lid.   This resulted in a new challenge. The point furthest from the gate on the body seemed to exhibit sinking, while flash occurred on the sides. Refacing the molds eliminated flash, but sinking still seemed to occur despite changes to shot size, pressure, and velocity. At Joe's recommendation we added a thin hole to the part to allow air to escape, which seemed to make this issue less prominent.
Bao Floor The floor is supposed to fit over the thermoformed bao zi and snap fit inside the body. Our floor fit well around the thermoformed bao zi, but the resulting diameter needs to be increased to 2.305" to snap fit with the new body. We are also slightly increasing the floor thickness to 0.1" to increase stiffness. Thus, we calculated a new model diameter of 2.349" with a shrinkage rate of 1.9%, calculated from the lab samples. Additionally, we saw flash around the ejector pin holes from our initial mold, which may be due to excessive reaming. We seek to fix these problems when we remake the molds. Once the floor molds have been remade, we should be ready to produce our yoyos!
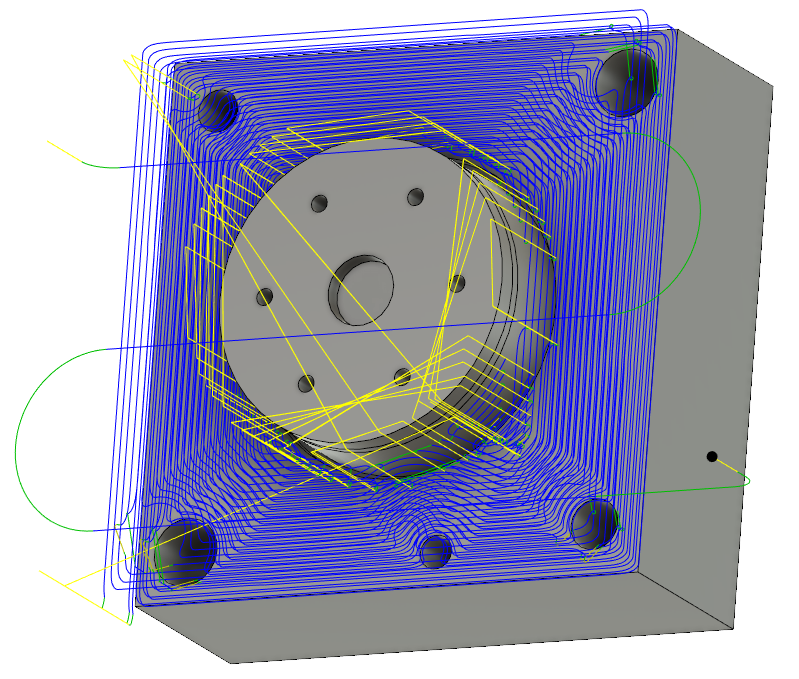
This week we continued working on fabricating molds and dyes. Unfortunately we ran into several challenges, but we're working on fixes to address each of them. It's not a 2.008 yo-yo if things don't go wrong at least a (baker's) dozen times! Lid We started with fabricating the lid cavity - our most complicated and time-consuming part. We successfully roughed the curved surface of the lid and were able to machine the fine weaving pattern, shown below:  Afterwards, the deep snap-fitting lip needed to machined with a 1/16" ball end mill. We attempted machining twice, and broke the mill both times. We went back to the drawing board, and found an additional problem with our CAM. Even if the 1/16" ball end mill didn't break, it ran a risk of intersecting the material later in the process. Our previous simulations didn't clearly reveal this issue. Therefore, we moved to modify the CAD and CAM to use a long straight 1/8" mill. We predict this will increase the milling speed, decrease the chance of braking, and eliminate any collisions. Body While working on the Body core CAM, we were unable to reach the bottom of the mold with any available tools. Additionally, we realized that the Body did not need to be as long as it was to accommodate the Bao Zi. Therefore, we decreased the length of the Body. The previously described increase in Lid dimension will occur on the inside of the Lid, so there will not need to be a chance to the Body in that dimension.  Bao Zi Even with decreased dumplings, the Bao Zi thermoforms still warped and delaminated like before. We 3D printed two new dyes - one with much smaller dumplings, and one where the dumplings are so big they touch each other, thereby eliminating the chance of having too much draw between them. Small (70% scale):
Big (overlapping, 110% scale):
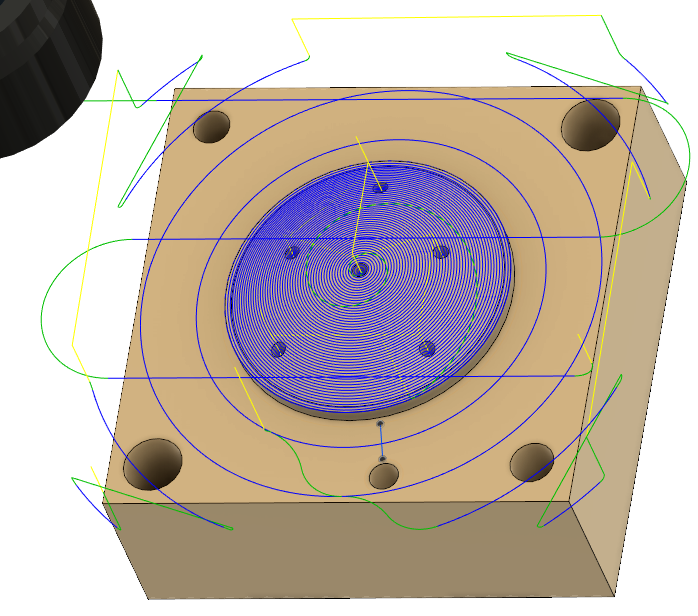
Floor The floor design directly reflects the Bao Zi. Once we select a working Bao Zi dye, we will create molds for the floor. Calendar We also created a calendar to plot our remaining time.  This week, coming back from Spring Break, we designed the molds for the injection molded parts, and we have the cam set up for machining the molds. Molds Floor The molds for the floor was pretty simple. Because it is a disk shape, the cavity part of the mold can just be a flat surface. The disk size was increased by 2% to compensate shrinkage. The ejector pins are placed sparsely on the disk.
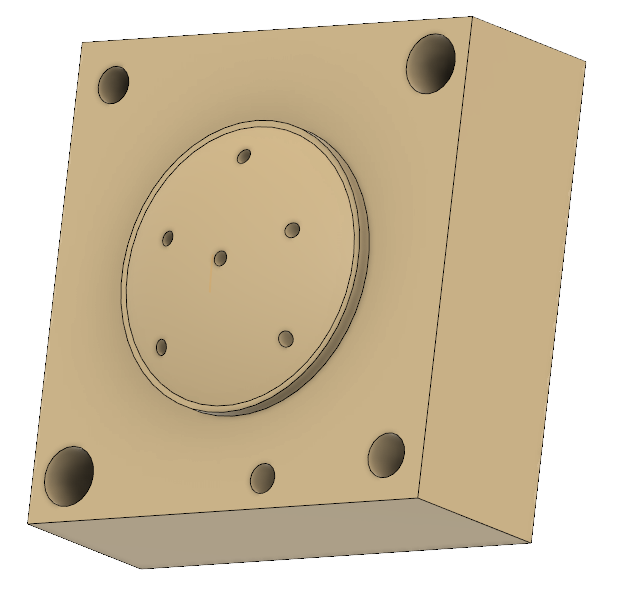
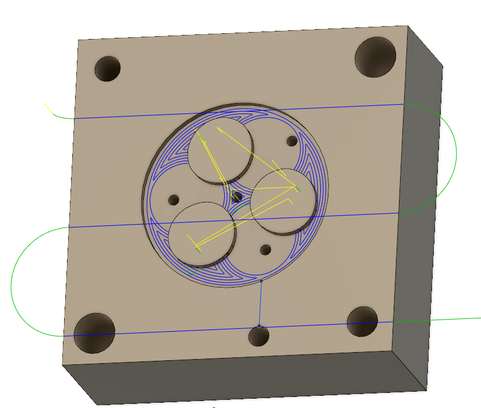
Body Below is the mold for the body of the yo-yo. Ejector pins have been placed in a circular pattern. We increased the size of the mold by 1.7% to compensate the shrinkage.
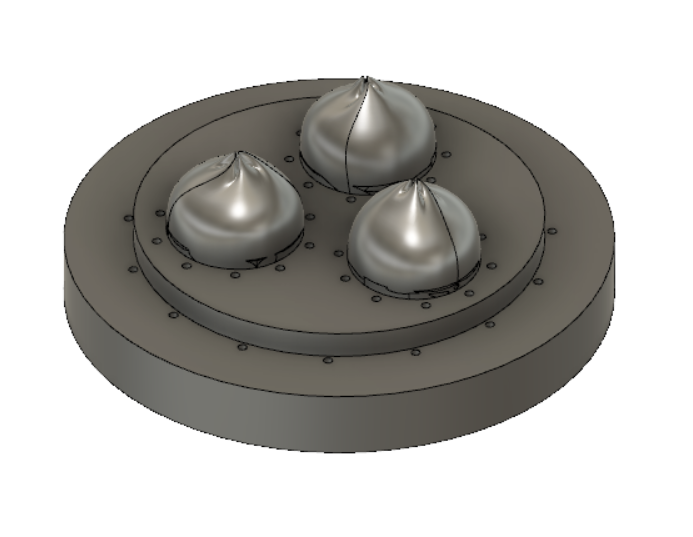
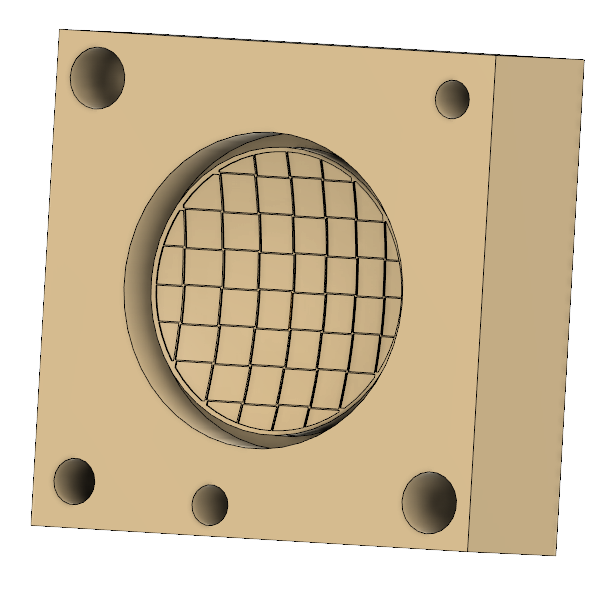
Lid The images below are the molds for the lid. The lid was scaled 2% larger to compensate shrinkage. This mold is the most complex compared to the other two. There might be some difficulty with the cam due to the surface of the lid. The core consists mostly of a curved surface. Unfortunately, this required that we place ejector pin holes on curved planes. We expect that this will lead to additional material filling in around the curvature and leading to flat indents. This should be fine, as the inside of the lid won't usually be visible.
CAM Floor
 Body
Lid
This week we improved our thermoforming dyes and began designing our injection molding molds. Bao Zi Our initial bao zi dye looked pretty tasty. Unfortunately, when we attempted thermoforming, the plastic didn't pull down between the buns. We tried increasing the heating and cooling times, but this only resulted in the white material delaminating from the plastic. Also, the height of the dye was off, so it was hard to punch the bao zi out of the sheet.  In order to fix this problem we implemented a few changes, including:
[This post is a design review of our yoyo , in preparation for injection mold and thermoform die production] Cross Section View 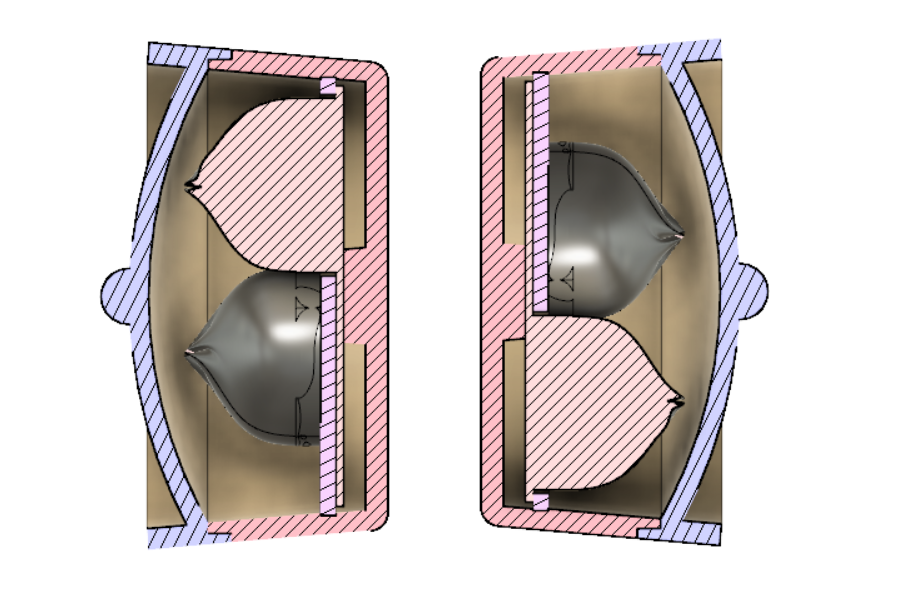 Exploded Model View Base - Bao Zi - Floor - Lid 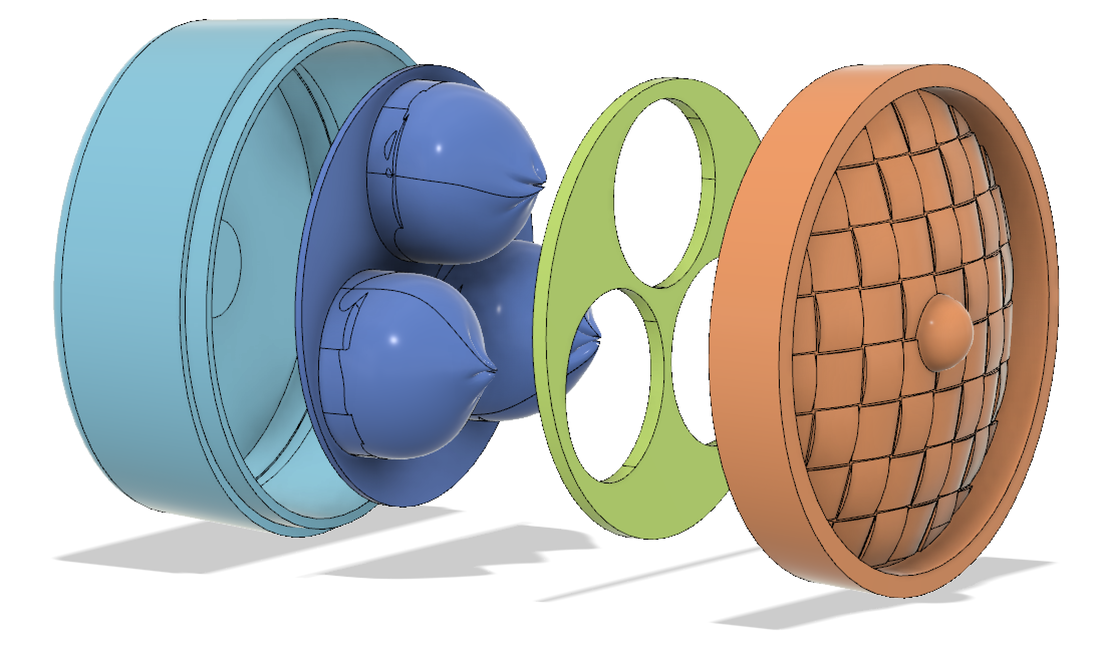 Drawings Assembly Plan Once all the parts have been made, the assembly process is fairly easy. All the parts fit together along the same axis. The body will encase the thermoformed baozi, while the floor piece snap fits onto the base, securing the baozi. The lid then snapfits onto the base, finishing one half of the yo-yo. Attach the yo-yo set screw onto the base of the finished half, as well as attaching the spacer. Repeat the same steps to create the other half of the yo-yo and attach the two halves together. Snap Fit Interference The yoyo contains two snap fits: one between the lid and body, and one between the floor and body. Each snap fit is modeled with 0.01” interference. Since the floor is a flat piece, force will transfer radially into the part without much flexing, so we expect this fit to be strong. The lid is attached to the end of the body atop the side walls, and this moment could cause more flexing. Therefore, we believe it will be possible to take on and off the lid as intended. 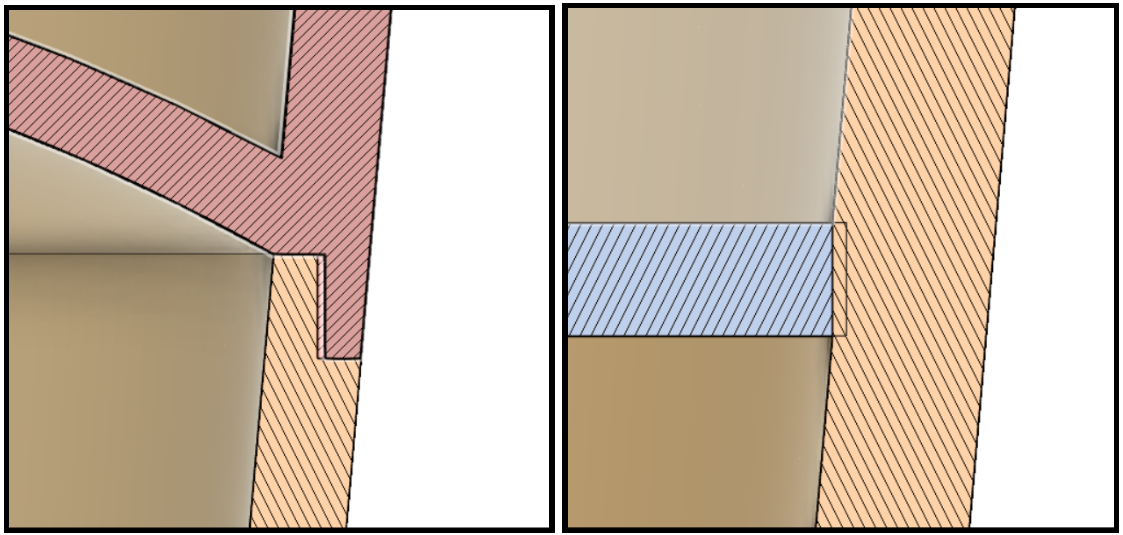 Shrinkage compensation plan To take shrinkage into account the mold size is slightly enlarged by 5%, as derived by comparing previous mold samples in lab. Additionally, drafts are included (defined below). Injection molding DFM To make the design manufacturable following modifications are made:
Yoyo performance estimation We evaluated the center of mass for our yoyo, and found that it coincided with the axis of rotation, which is ideal. Note: in the actual yoyo, the bao zi will be made from thin thermoformed plastic. Therefore, the center of mass will be closer to the core of the yoyo. There will likely be little effect on actual motion. 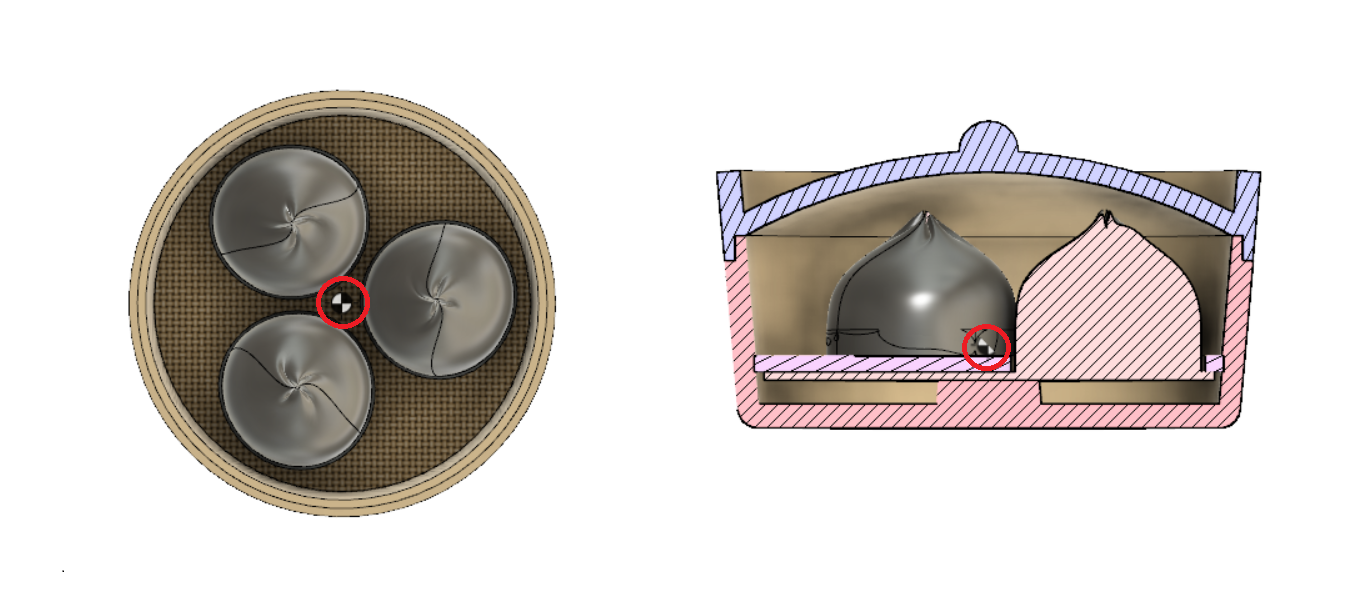 With preliminary ideation done and our theme chosen, we began sketching and CADing an initial design. Each half of our yoyo must consist of 3 injection molded parts and 1 thermoformed part. We settled on having those be:
With these considerations in mind, we worked on CADing a first pass. The tray, floor, and lid were produced together as a single revolved sketch. The dumplings were produced by designing one bao in detail and then creating a circular pattern. 
During this meeting we went through an ideation process to select our initial yo-yo design. The process consisted of four rounds. Below, ideas which only made it up to a certain round are listed, with the final ideas appearing in round 4. The rounds consisted of:
Round 3
Round 4
Winner: Bao Zi!Team Bao brainstormed around a hundred yo-yo ideas, and we were able to narrow it down to one: bao zi on a steaming tray. Traditionally, bao zi are steamed buns with a pork filling. The concept of our yo-yo is a steaming tray on which three bao zi sit. We also want to make a lid for the steaming tray to give the users a pleasant surprise when they open the lid to reveal the bao zi. To manufacture the parts, we are thinking about thermoforming the bao zi, while injection molding the steaming tray and its lid. The steaming tray would snap on over the bao zi and the lid would snap fit onto the tray. Initial Sketches 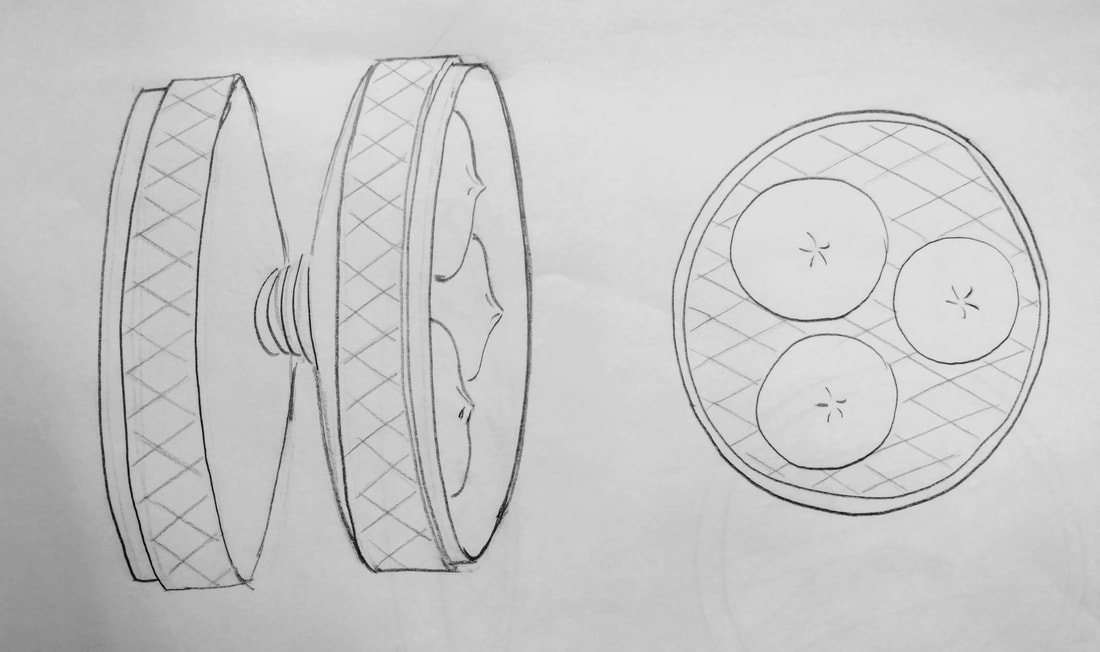 Bao Zi Yo-yo and profile  Steaming-tray lid Inspiration credit: https://www.chinasichuanfood.com/baozi/
 Hello, and welcome to our blog! Team Bao is excited to be building together this semster. We are (left to right):
|